Dual Boot Kolibrios with Windows NT/2K/XP
There are two ways for doing this, using two different bootloaders. They work the same but are different to install.
These boot methods will not work on a partition formatted in FAT12 or FAT16!
Only FAT32 and NTFS are supported!
Windows 7
The process on Windows 7 is different compared to Windows XP/2k/NT etc . Since there is no boot.ini available on Windows 7, you must create a boot entry using another tool, called EasyBCD.
Here are the steps :
1) Install EasyBCD from http://neosmart.net/EasyBCD/ . The non-commercial license is free for use.
2) Open EasyBCD.
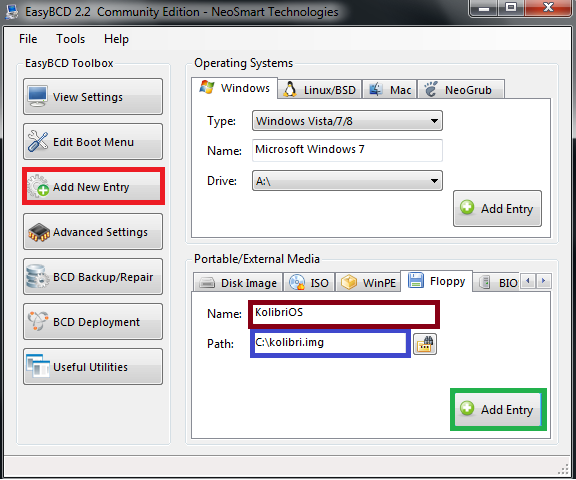
3) Click "Add New Entry".
4) Under "Portable/External Media" section :
5) Enter what you want as the name. I chose "KolibriOS".
6) In the path field, enter the path where you have kolibri.img ("C:\kolibri.img" in my case).
7) Click "Add Entry" in the same "Portable/External Media" section.
Done.
Reboot into KolibriOS and have fun.
Windows NT/2k/XP
The Well-explained way
First and foremost. You need the following files:
- mtldr: http://ftp.kolibrios.org/pub/bootloaders/mtldr (it is the kolibri loader just like ntdlr for winxp)
- kolibri.img: you can get this file from the latest distro on http://kolibrios.org/en/download (it's inside the binary package)
- Copy those files to your first partition (commonly C: ) It doesn't matter if it is a NTFS partition, KolibriOS is capable to run from it.
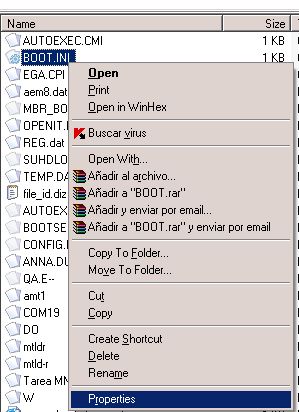
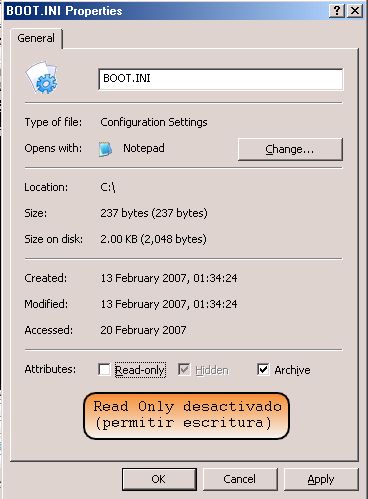
- Open the file "boot.ini" which is commonly located at root (c: ). However, you should change its properties to writeable as you can see in the following images:
maybe you're a newbie at WinXP, so you must know that you must set your folder options to show "hidden files", and exclusively "system files"
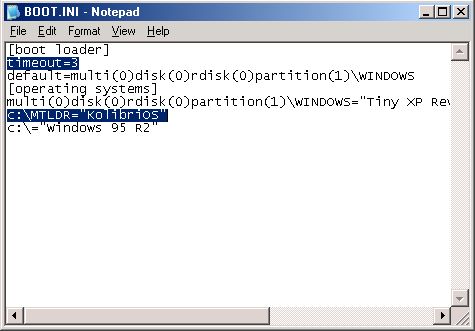
- You must add the following lines to your "boot.ini" file:
c:\mtldr="KolibriOS"
maybe a picture could help:
- save it and all is set, only left to reboot...
- Notice that you can change the timeout to 3 seconds or less that way you won't wait a lot until your default operating system runs while you're not in the mood to select manually..
This tutorial was originally written by Vhanla.
the other way
You need only the two files in this zip:
HDD_Boot.zip.
- Create a folder C:\kolibri , Copy the Kolibrios Files (kernel.mnt and kolibri.img) into that folder.
- Extract the zipfile into the same directory and run setboot.exe, follow the instructions.
- Open the file C:\boot.ini and add the parameter C:\kolibri\boot.bin="KolibriOS_HDD".
- Restart your computer and select "KolibriOS_HDD" in the boot menu.


