Setting up VirtualBox: Difference between revisions
No edit summary |
No edit summary |
||
| (12 intermediate revisions by 3 users not shown) | |||
| Line 1: | Line 1: | ||
= Getting started = | |||
First, download the KolibriOS distribution of your like, you may chose between a floppy or CD distribution.<br> | |||
The downloads on the site are packed with 7-zip, you'll need 7-zip or another unpacker to unzip the file.<br> | |||
Extract the file called kolibri.img (for the floppy distribution) or kolibri.iso (for the CD distribution) to a directory on your harddrive.<br> | |||
Remember where you have put it.<br> | |||
'''Note: There are no guest addons for KolibriOS under VirtualBox yet (because KolibriOS is a totally separate Operating System, not based on Linux or Windows).''' So don't bother looking for them. If you really want guest addons for KolibriOS to be available, you may offer your help in porting them :-) | |||
= Creating the VM = | |||
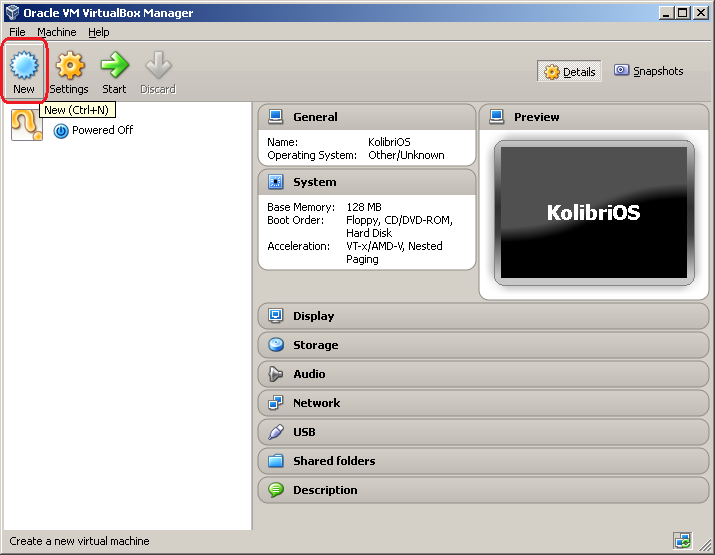
Then, after installing VirtualBox, click the 'new' button.<br> | |||
[[Image:vbox-floppy-1.png]] | [[Image:vbox-floppy-1.png]] | ||
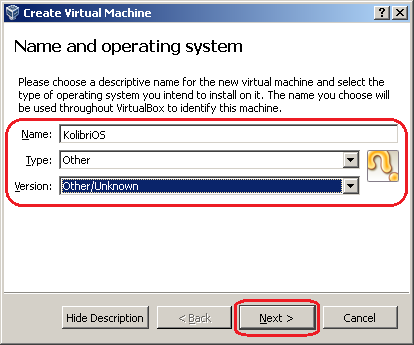
Type the name for your virtual machine and select the OS type.<br> | |||
[[Image:vbox-floppy-2.png]] | [[Image:vbox-floppy-2.png]] | ||
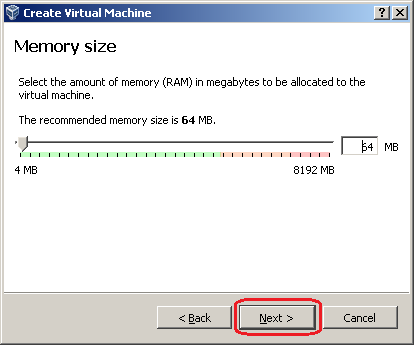
Choose the amount of RAM you want to use, 64 Mb is enough.<br> | |||
Unless if you want to run DOSbox or other heavy applications, 256 Mb may be a better setting then.<br> | |||
[[Image:vbox-floppy-3.png]] | [[Image:vbox-floppy-3.png]] | ||
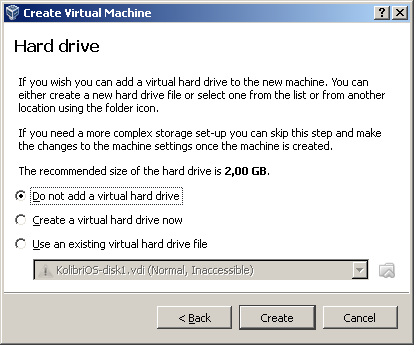
We dont need a harddrive. <br> | |||
If you'd like to use a harddrive, you will need another virtual OS to format it, as KolibriOS currently does not have a format program.<br> | |||
[[Image:vbox-floppy-4.png]] | [[Image:vbox-floppy-4.png]] | ||
If you chose not to use a harddrive, you'll get this warning, just continue.<br> | |||
[[Image:vbox-floppy-5.png]] | [[Image:vbox-floppy-5.png]] | ||
= Mounting the virtual floppy/cd image = | |||
Now that the virtual machine is created, we need to attach the CD or floppy image.<br> | |||
The CD image comes with some extra programs, but it's easier to update the floppy image when you plan to do some development.<br><br> | |||
[[Image:vbox-floppy-6.png]] | [[Image:vbox-floppy-6.png]] | ||
If you chose to use the CD image, simply select the CD/DVD drive and add the iso as shown in the picture.<br> | |||
[[Image:vbox-cd.png]] | [[Image:vbox-cd.png]] | ||
If you however would rather like to use the Floppy image, we'll need to add a floppy controller first.<br> | |||
[[Image:vbox-floppy-7.png]] | [[Image:vbox-floppy-7.png]] | ||
Once the floppy controller is added, attach the kolibri.img virtual floppy as follows.<br> | |||
[[Image:vbox-floppy-8.png]] | [[Image:vbox-floppy-8.png]] | ||
[[Image:vbox-floppy-9.png]] | [[Image:vbox-floppy-9.png]] | ||
= Network = | |||
If you have internet access on your host machine, you can share it with the guest OS. | |||
Go to the network tab and enable at least one network adapter, if not already enabled. | |||
If you don't know where to couple this virtual network adapter to, choose "NAT". | |||
KolibriOS supports both the PCnet and the Intel PRO/1000 card families as emulated by virtualbox. | |||
= USB = | |||
KolibriOS has USB support for quite some time now, and it can be useful to mount a USB device connected to the host machine, onto the virtual machine. <br> | |||
You will need to enable USB support in the virtual machine. <br> | |||
It also makes sense to install Extension Pack for USB 2.0 support.<br> | |||
When you're using linux, you'll also need to be a member of the vboxusers group for USB to work.<br> | |||
To become a member of this group, you may use the following command: | |||
<code> | |||
sudo usermod -aG vboxusers <username> | |||
</code><br> | |||
A detailed article is available on this matter: http://www.dedoimedo.com/computers/virtualbox-usb.html | |||
<br><br> | |||
Since version #4529 it's possible to use the VirtualBox USB-tablet input device.<br> | |||
When using this device, it's no longer needed to capture and release the pointing device to the Guest OS, which may be convenient.<br> | |||
[[Image:Virtualbox_usb_tablet.png]] | |||
= First run = | |||
Now just click start, and let it fly!<br> | |||
[[Image:vbox-floppy-10.png]] | [[Image:vbox-floppy-10.png]] | ||
[[Category:Manuals]] | [[Category:Manuals]] | ||
Latest revision as of 16:45, 10 March 2016
Getting started
First, download the KolibriOS distribution of your like, you may chose between a floppy or CD distribution.
The downloads on the site are packed with 7-zip, you'll need 7-zip or another unpacker to unzip the file.
Extract the file called kolibri.img (for the floppy distribution) or kolibri.iso (for the CD distribution) to a directory on your harddrive.
Remember where you have put it.
Note: There are no guest addons for KolibriOS under VirtualBox yet (because KolibriOS is a totally separate Operating System, not based on Linux or Windows). So don't bother looking for them. If you really want guest addons for KolibriOS to be available, you may offer your help in porting them :-)
Creating the VM
Then, after installing VirtualBox, click the 'new' button.
Type the name for your virtual machine and select the OS type.
Choose the amount of RAM you want to use, 64 Mb is enough.
Unless if you want to run DOSbox or other heavy applications, 256 Mb may be a better setting then.
We dont need a harddrive.
If you'd like to use a harddrive, you will need another virtual OS to format it, as KolibriOS currently does not have a format program.
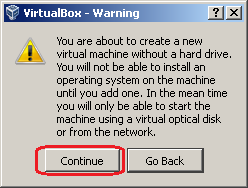
If you chose not to use a harddrive, you'll get this warning, just continue.
Mounting the virtual floppy/cd image
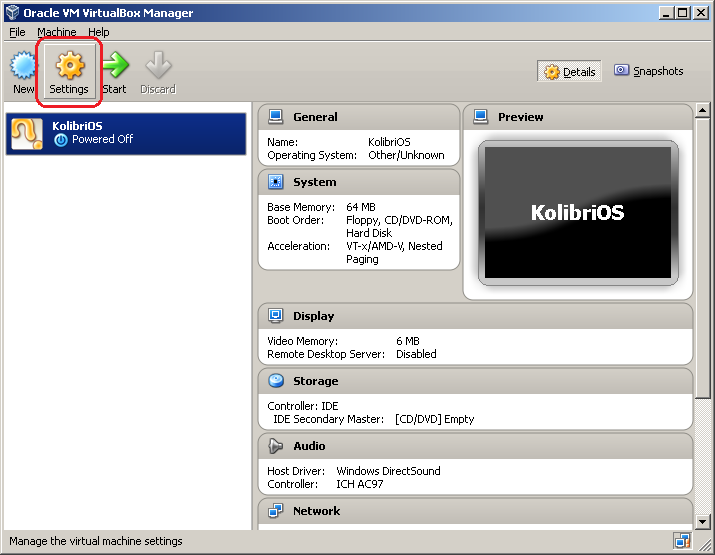
Now that the virtual machine is created, we need to attach the CD or floppy image.
The CD image comes with some extra programs, but it's easier to update the floppy image when you plan to do some development.
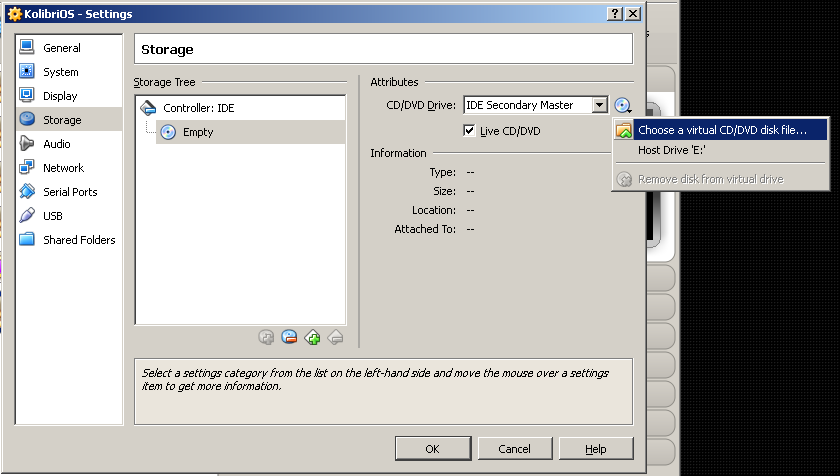
If you chose to use the CD image, simply select the CD/DVD drive and add the iso as shown in the picture.
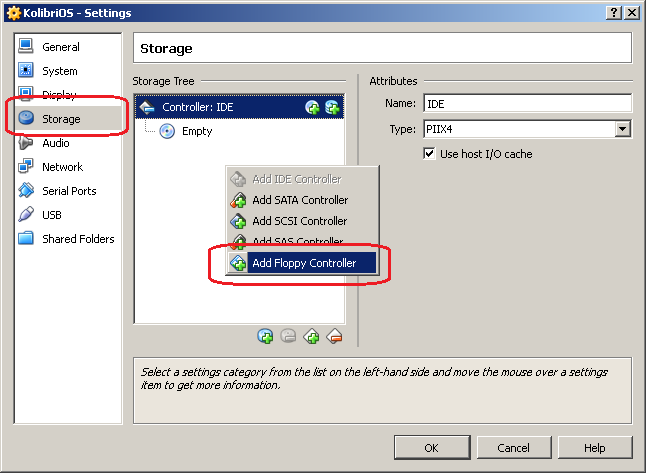
If you however would rather like to use the Floppy image, we'll need to add a floppy controller first.
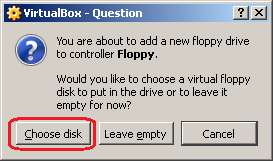
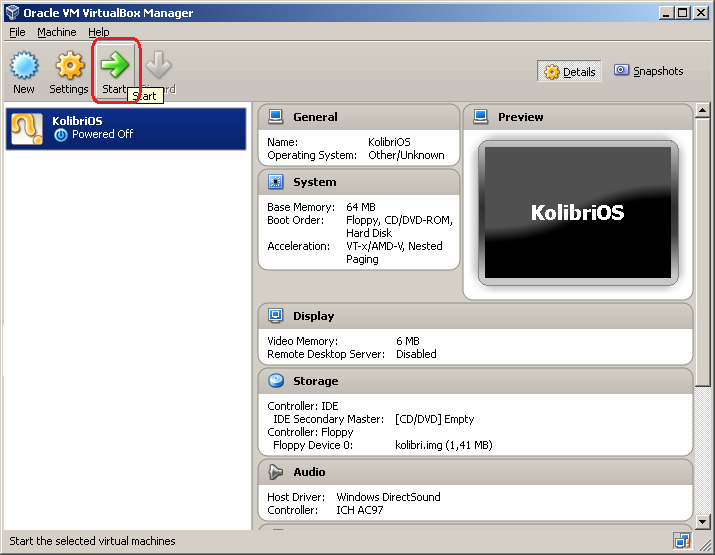
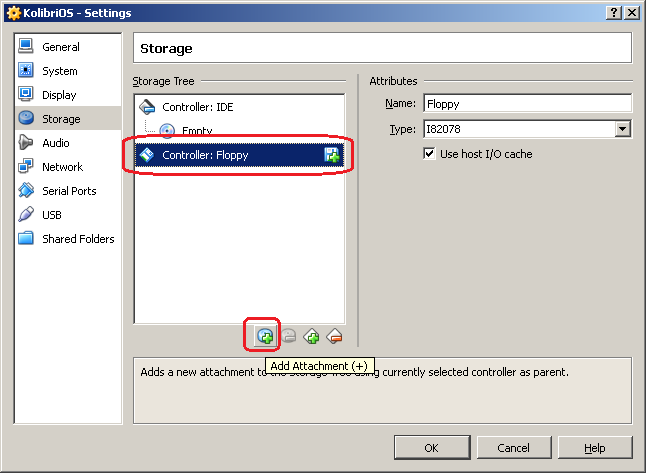
Once the floppy controller is added, attach the kolibri.img virtual floppy as follows.
Network
If you have internet access on your host machine, you can share it with the guest OS. Go to the network tab and enable at least one network adapter, if not already enabled. If you don't know where to couple this virtual network adapter to, choose "NAT".
KolibriOS supports both the PCnet and the Intel PRO/1000 card families as emulated by virtualbox.
USB
KolibriOS has USB support for quite some time now, and it can be useful to mount a USB device connected to the host machine, onto the virtual machine.
You will need to enable USB support in the virtual machine.
It also makes sense to install Extension Pack for USB 2.0 support.
When you're using linux, you'll also need to be a member of the vboxusers group for USB to work.
To become a member of this group, you may use the following command:
sudo usermod -aG vboxusers <username>
A detailed article is available on this matter: http://www.dedoimedo.com/computers/virtualbox-usb.html
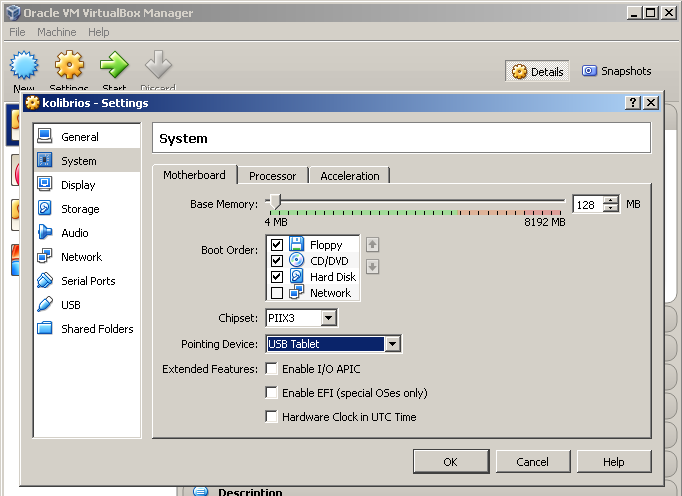
Since version #4529 it's possible to use the VirtualBox USB-tablet input device.
When using this device, it's no longer needed to capture and release the pointing device to the Guest OS, which may be convenient.
